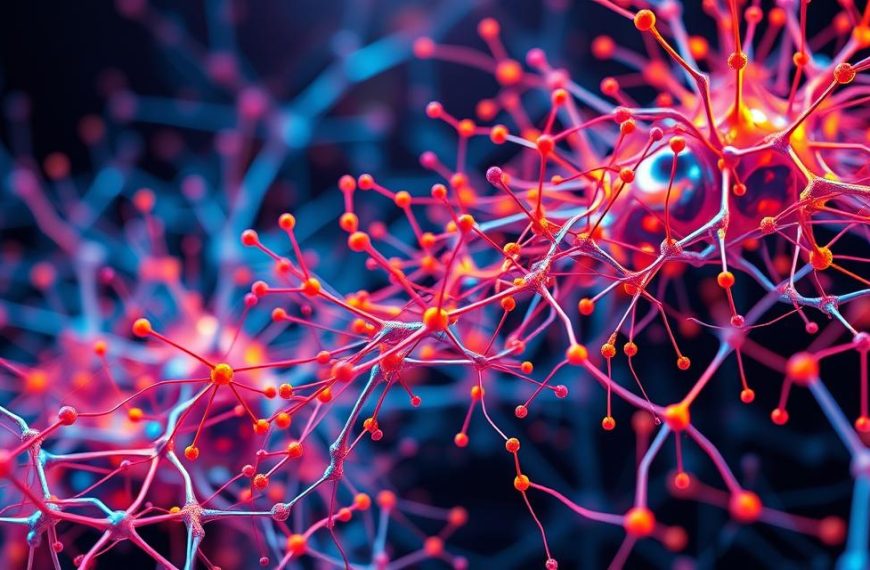

Understanding the fundamentals of neural networks is essential in today’s tech-driven world. These models power everything from image recognition to complex decision-making systems. By learning to build neural structures, you gain insights into their inner workings and applications.
Key components like layers, activation functions, and propagation mechanisms form the backbone of any network. Frameworks like PyTorch simplify the process, offering tools like nn.Module for creating complex architectures. For instance, the FashionMNIST dataset uses 28×28 image inputs with 512-node hidden layers for classification tasks.
Real-world applications, such as solving the XOR gate problem with NumPy, demonstrate the versatility of these models. Whether you’re using PyTorch or coding from scratch, a solid grasp of Python and linear algebra is crucial. This guide will walk you through both approaches, equipping you with the skills to tackle diverse challenges.
Understanding Neural Networks
Neural networks are powerful tools for solving complex problems. They mimic the brain’s structure, using interconnected layers to process data. These models transform raw inputs into meaningful outputs, making them essential for tasks like image recognition and predictive analysis.
What is a Neural Network?
At their core, neural networks are mathematical function approximators. They consist of weights and biases that adjust during learning. These adjustments enable the network to make accurate predictions or classifications. Unlike biological neurons, artificial neurons process data in a structured, layered manner.
Key Components of a Neural Network
Neural networks are built with three main types of layers: input, hidden, and output. Each layer processes data differently, extracting features and making decisions. Trainable parameters like weights and biases are optimized during training to minimize errors.
Activation functions introduce non-linearity, enabling the network to learn complex patterns. Common choices include ReLU, sigmoid, and tanh. Below is a comparison of these functions:
| Activation Function | Range | Use Case |
|---|---|---|
| ReLU | [0, ∞) | Hidden layers |
| Sigmoid | (0, 1) | Binary classification |
| Tanh | (-1, 1) | Hidden layers |
The equation Y = WX + B represents the basic operation in a neural network. Here, weights (W) and biases (B) are adjusted during learning to improve accuracy. Frameworks like PyTorch automate this process, making it easier to build and train complex models.
Setting Up Your Development Environment
The right tools and libraries are crucial for efficient neural network development. A well-prepared workspace ensures smooth data processing and accurate model training. This section guides you through selecting tools, installing packages, and configuring your environment.

Choosing the Right Tools and Libraries
Frameworks like PyTorch and TensorFlow simplify the creation of complex models. PyTorch is ideal for dynamic computation graphs, while TensorFlow excels in production-ready deployments. For scratch builds, NumPy provides essential code functionality.
Here’s a comparison of popular frameworks:
| Framework | Strengths | Use Case |
|---|---|---|
| PyTorch | Dynamic computation, research-friendly | Prototyping, academic projects |
| TensorFlow | Scalability, production-ready | Enterprise applications |
| NumPy | Lightweight, flexible | Custom implementations |
Installing Necessary Packages
Start by installing PyTorch with CUDA support for GPU acceleration. Use the following command:
pip install torch torchvision torchaudio --extra-index-url https://download.pytorch.org/whl/cu117Verify your installation with torch.cuda.is_available(). For visualization, install matplotlib:
pip install matplotlibHardware considerations are vital. GPUs accelerate training, while TPUs offer high-speed parallel processing. Choose based on your project’s input size and complexity.
Organize your workspace with a clear directory structure. Use virtual environments to manage dependencies and avoid conflicts. This ensures consistent values across different runs.
Defining the Neural Network Architecture
Designing a neural network starts with defining its architecture. The structure determines how data flows through the system, from input data to final outputs. A well-planned architecture ensures efficient learning and accurate predictions.
Input, Hidden, and Output Layers
The input layer receives raw data, such as 28×28 pixel images for FashionMNIST. Hidden layers process this data, extracting features and patterns. The final output layer produces predictions, like classifying images into 10 categories.
For example, FashionMNIST uses a structure like Flatten → Linear(784-512) → ReLU → Linear(512-512) → ReLU → Linear(512-10). This setup ensures efficient feature extraction and classification.
Choosing the Right Activation Functions
Activation functions introduce non-linearity, enabling the network to learn complex patterns. ReLU is ideal for hidden layers, while softmax works well for classification tasks in the output layer.
In PyTorch, you can stack layers using nn.Sequential:
model = nn.Sequential(
    nn.Flatten(),
    nn.Linear(784, 512),
    nn.ReLU(),
    nn.Linear(512, 512),
    nn.ReLU(),
    nn.Linear(512, 10)
)
For custom implementations in NumPy, you can define activation functions like sigmoid or tanh. Proper selection prevents issues like vanishing gradients.
Understanding these components is crucial for building effective neural network architectures. With the right design, you can tackle diverse challenges in machine learning.
Initializing Weights and Biases
Proper initialization of weights and biases is a critical step in building effective models. Poor choices can lead to slow convergence or even complete failure in training. Understanding the impact of initialization helps in designing robust systems.

Why Initialization Matters
Initialization sets the starting values for weights and biases. If these parameters are too large or too small, the model may struggle to learn. For example, all-zero initialization can cause neurons to update identically, leading to a lack of diversity in learning.
Common pitfalls include vanishing or exploding gradients. These issues arise when weights are improperly scaled, making it difficult for the model to adjust during training. Proper initialization ensures a balanced start, enabling smoother optimization.
Common Initialization Techniques
Several methods exist to initialize weights and biases effectively. Each technique has its strengths and is suited for specific scenarios:
- Random Initialization: Assigns small random values to weights. This method introduces diversity but requires careful scaling.
- He Initialization: Scales weights based on the number of input neurons. It works well with ReLU activation functions.
- Xavier/Glorot Initialization: Balances weights by considering both input and output neurons. It prevents gradient issues in deeper networks.
In PyTorch, you can inspect layer parameters using model.named_parameters(). This allows you to verify initialization and make adjustments as needed.
For custom implementations in NumPy, you can define initialization functions tailored to your model’s architecture. Proper initialization ensures that the model starts with a strong foundation, leading to better performance.
Implementing Forward Propagation
Forward propagation is the backbone of any neural network, driving data through layers to produce meaningful outputs. This process involves transforming input values using weights, biases, and activation functions. Understanding this mechanism is essential for building and debugging models effectively.

How Forward Propagation Works
At its core, forward propagation applies a series of affine transformations to the input data. The equation Y = WX + B represents this process, where weights (W) and biases (B) are adjusted during training. Activation functions like ReLU or sigmoid introduce non-linearity, enabling the network to learn complex patterns.
Batch processing is crucial for efficiency. By handling multiple data points simultaneously, matrix operations accelerate computations. Debugging tools ensure matrix dimensions match, preventing errors during execution.
Coding the Forward Pass
In PyTorch, forward propagation is automated via the __call__ method. Here’s an example using a simple architecture:
import torch.nn as nn

model = nn.Sequential(
    nn.Linear(784, 512),
    nn.ReLU(),
    nn.Linear(512, 10)
)

outputs = model(input_data)
For NumPy implementations, manual matrix multiplication and activation application are required. Below is a comparison of the two approaches:
| Framework | Forward Pass Implementation | Advantages |
|---|---|---|
| PyTorch | Automated via __call__ |
Simplifies coding, handles batch processing |
| NumPy | Manual matrix operations | Full control, ideal for custom architectures |
Edge cases, like NaN values, must be handled to ensure smooth execution. Tools like TensorBoard visualize intermediate layer outputs, aiding in debugging and optimization.
Finally, converting logits to probabilities via softmax ensures interpretable results. This step is vital for classification tasks, such as FashionMNIST.
Understanding Backpropagation
Backpropagation is the engine that drives the learning process in machine models. It enables the networkto adjust its parameters by calculating gradients of the loss function. This iterative process ensures the model improves its accuracy over time.

The Role of Backpropagation in Training
During training, backpropagation computes gradients using the chain rule. These gradients indicate how much each parameter contributes to the loss. By updating weights and biases, the network minimizes errors and enhances performance.
Frameworks like PyTorch simplify this process with autograd. It automatically calculates gradients, saving time and effort. Manual implementations, however, require explicit chain rule calculations for each layer.
Implementing Backpropagation in Code
In PyTorch, backpropagation is initiated with loss.backward(). This method computes gradients for all trainable parameters. Here’s an example:
loss = criterion(outputs, labels)
loss.backward()
optimizer.step()
For manual implementations, you need to derive gradients for each layer. Below is a comparison of automatic and manual approaches:
| Method | Advantages | Use Case |
|---|---|---|
| Automatic (PyTorch) | Simplifies coding, handles complex architectures | Prototyping, large-scale projects |
| Manual (NumPy) | Full control, ideal for custom designs | Educational purposes, small-scale implementations |
Debugging gradients is crucial. Techniques like finite differences help verify calculations. Clipping gradients prevents issues like vanishing or exploding values, ensuring stable training.
“Backpropagation is the cornerstone of modern machine learning, enabling models to learn from data efficiently.”
Visualizing gradient distributions across layers provides insights into the model’s behavior. Tools like TensorBoard make this process easier, helping optimize performance.
Training the Neural Network
Training a machine learning model involves fine-tuning its parameters for optimal performance. This phase is critical, as it determines how well the model can generalize to new data. The training process includes defining a loss function, selecting optimization algorithms, and iterating through epochs to minimize errors.

Defining the Loss Function
The loss function measures the difference between predicted and actual values. For classification tasks like FashionMNIST, cross-entropy loss is commonly used. It penalizes incorrect predictions more heavily, guiding the training process toward better accuracy.
Other loss functions include:
- Mean Squared Error (MSE): Ideal for regression tasks.
- Binary Cross-Entropy: Used in binary classification problems, such as the XOR network.
- Custom Loss Functions: Tailored to specific needs, like handling imbalanced datasets.
Choosing the right loss function ensures the model learns effectively. For example, weighted losses can address class imbalances, improving performance on underrepresented classes.
Optimization Algorithms
Optimizers adjust the model’s parameters to minimize the loss. Common choices include Stochastic Gradient Descent (SGD) and Adam. SGD updates parameters using a fixed learning rate, while Adam adapts the rate dynamically, often leading to faster convergence.
Here’s a comparison of popular optimizers:
| Optimizer | Strengths | Use Case |
|---|---|---|
| SGD | Simple, easy to tune | Small datasets, linear models |
| Adam | Adaptive learning rate | Complex architectures, large datasets |
Learning rate scheduling can further enhance performance. Techniques like step decay or cosine annealing adjust the rate during training, preventing stagnation.
Setting up a training loop involves iterating through epochs and batches. Monitoring metrics like loss and accuracy curves helps identify issues early. Early stopping based on validation loss prevents overfitting, ensuring the model generalizes well.
“The right combination of loss function and optimizer is key to successful training.”
For custom implementations, NumPy can be used to manually define the training loop. Hyperparameter tuning, such as adjusting batch size and learning rate, plays a crucial role in achieving optimal results.
Visualizing decision boundaries during training provides insights into the model’s learning process. Tools like TensorBoard make it easier to track progress and make informed adjustments.
Testing and Validating the Model
Effective model validation ensures reliable predictions and robust results. This phase is critical for assessing how well your model performs on unseen data. By splitting your dataset into training, validation, and test sets, you can evaluate its generalization capabilities.

Evaluating Model Performance
Start by dividing your dataset into a 60-20-20 split for training, validation, and testing. This approach ensures a balanced evaluation. Calculate metrics like accuracy, precision, and recall to measure performance. Confusion matrices provide insights into classification errors, helping identify areas for improvement.
For example, in PyTorch, use model.eval() to switch to evaluation mode. This disables dropout and batch normalization, ensuring consistent results. Compare training and test set performance to detect overfitting. Tools like k-fold cross-validation enhance reliability by averaging metrics across multiple folds.
Improving Generalization
Regularization techniques like L2 regularization and dropout prevent overfitting. These methods introduce constraints during training, improving the model’s ability to generalize. Data augmentation, such as flipping or rotating images, further enhances performance by increasing variables in the training set.
Error analysis on misclassified samples provides actionable insights. For binary classification, generate ROC curves to visualize trade-offs between true positive and false positive rates. Export models to formats like ONNX or Python for deployment, ensuring compatibility across platforms.
“Validation is not just a step; it’s the foundation of a reliable model.”
By applying these strategies, you can ensure your model delivers accurate predictions and robust results. Proper validation and generalization techniques are essential for building trustworthy machine learning systems.
Conclusion
Building effective machine learning systems requires mastering both framework-based and custom implementations. From setting up your environment to deploying the final model, each stage plays a crucial role in achieving accurate results. Whether using PyTorch or coding from scratch, understanding the process ensures flexibility and control.
Framework-based approaches simplify development, while scratch implementations offer deeper insights into the neural network’s mechanics. Advanced architectures like CNNs and RNNs extend capabilities for tasks like image segmentation and NLP. Debugging tools and interpretability techniques enhance reliability, making it easier to refine models.
Continuous learning is essential in this evolving field. Experiment with diverse datasets and explore resources for deeper mathematical understanding. By democratizing AI through accessible frameworks, we empower more individuals to build neural systems that solve real-world problems.
FAQ
What is a Neural Network?
A neural network is a computational model inspired by the human brain. It consists of interconnected layers that process input data to produce outputs. These models are widely used for tasks like image recognition, prediction, and classification.
What are the Key Components of a Neural Network?
The main components include input layers, hidden layers, output layers, activation functions, weights, and biases. These elements work together to transform input data into meaningful predictions.
How Do You Choose the Right Tools and Libraries?
Popular libraries like TensorFlow, PyTorch, and Keras are commonly used. The choice depends on the task, ease of use, and compatibility with your development environment.
Why is Initializing Weights and Biases Important?
Proper initialization ensures the model trains efficiently. Poor initialization can lead to slow convergence or suboptimal results. Techniques like Xavier or He initialization are often used.
What is Forward Propagation?
Forward propagation is the process of passing input data through the network layers to generate an output. It involves applying weights, biases, and activation functions at each layer.
What Role Does Backpropagation Play in Training?
Backpropagation adjusts the model’s weights and biases by calculating the gradient of the loss function. This process minimizes errors and improves the model’s accuracy over time.
How Do You Define a Loss Function?
A loss function measures the difference between the model’s predictions and the actual values. Common choices include Mean Squared Error for regression and Cross-Entropy Loss for classification.
What are Optimization Algorithms?
Optimization algorithms like Stochastic Gradient Descent (SGD) or Adam adjust the model’s parameters to minimize the loss function. They play a critical role in the training process.
How Do You Evaluate Model Performance?
Performance is evaluated using metrics like accuracy, precision, recall, or F1 score. Validation datasets help assess how well the model generalizes to unseen data.
What Steps Improve Generalization?
Techniques like regularization, dropout, and data augmentation help prevent overfitting. These methods ensure the model performs well on both training and test datasets.

 By
By